Web Portal Feature Guide
Summary
The ImageMover Web Portal is the portal for managing your organization’s test administration. The Web Portal is available to all users, and displays additional settings for administrators. There are seven main features in the Web Portal: Test Metric Dashboards, Test Subject Review, Test Result editing, Export Results, Access Requests, User Editing, and Organization Management.
Accessing the Web portal
To access your organization's web portal, navigate to organization.imagemovermd.com. The specific URL is enclosed in your welcome email from ImageMover. If you have lost it, reach out to support@imagemovermd.com for assistance. You will login with the same credentials used in the mobile application
Test Metric Dashboards
Once you have logged in, you will be greeted with a home screen (shown below). The top navigation bar displays all the available activities to your user account.
This dashboard displays a high level overview of recent tests performed by your organization. There is a customizable date drop down selector, and if you manage multiple organizations you can drill down to see organization specific numbers with the “Organization” drop down. Be sure to press Update on the right in order to see the filter selections reflected in the numbers and graph.
Test Subject Review
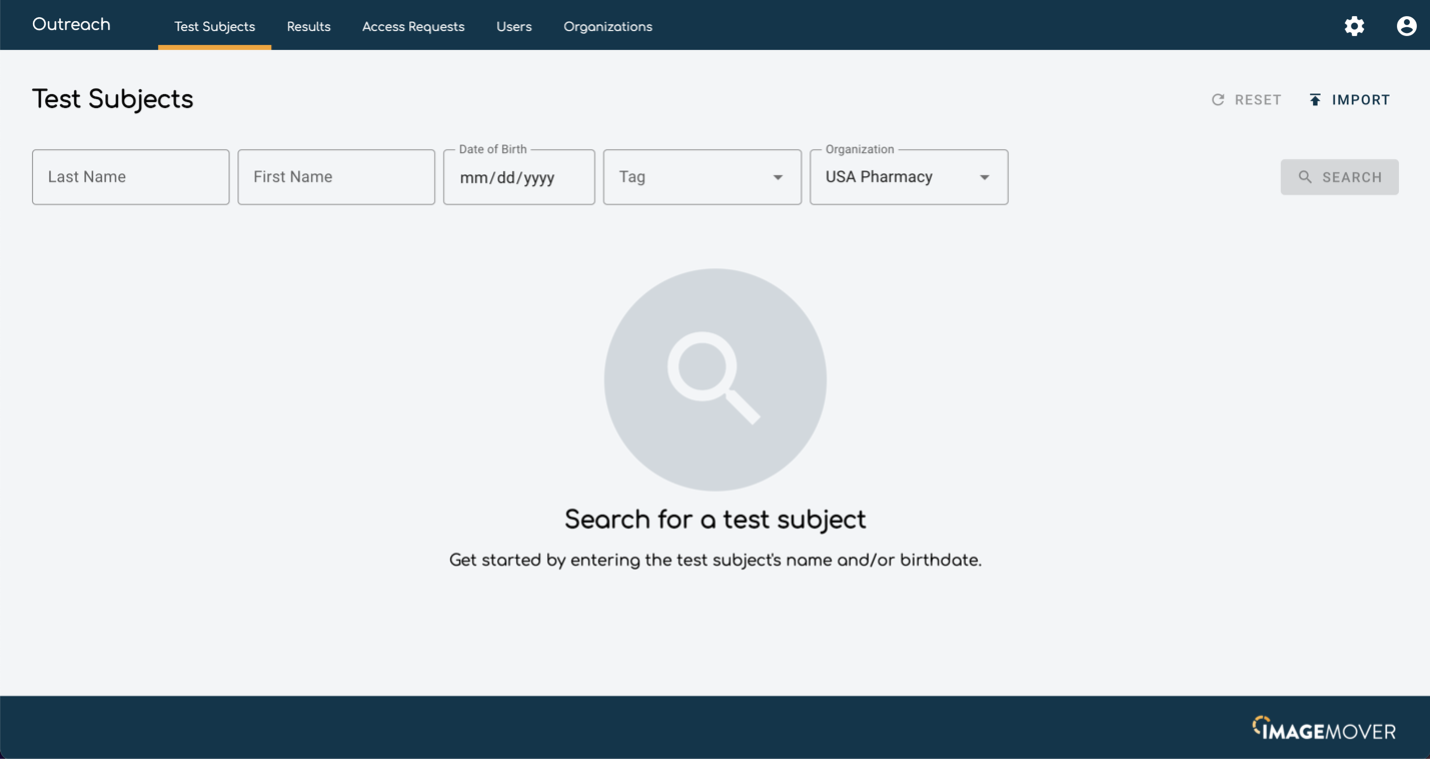
When navigating to the “Test Subjects” activity from the main navigation bar, we are brought to a search screen. Note that you must have either Organization Manager or Can Manage Test Subjects rights in order to access to access the Test Subjects activity.
Here we can find test subjects directly to edit their information or export all of their test results. You can find a test subject by searching their complete last name. Partial name search is not supported in the web portal, but if you are unsure of spelling, you can enter a name and the search results will return matches that sound like what you entered (i.e. “Johnson” would return Johnson, Johnston, Jenson, Jensen, etc.)
Once you have found the test subject you are looking for, clicking anywhere on the row brings you to their Test Subject Details page.
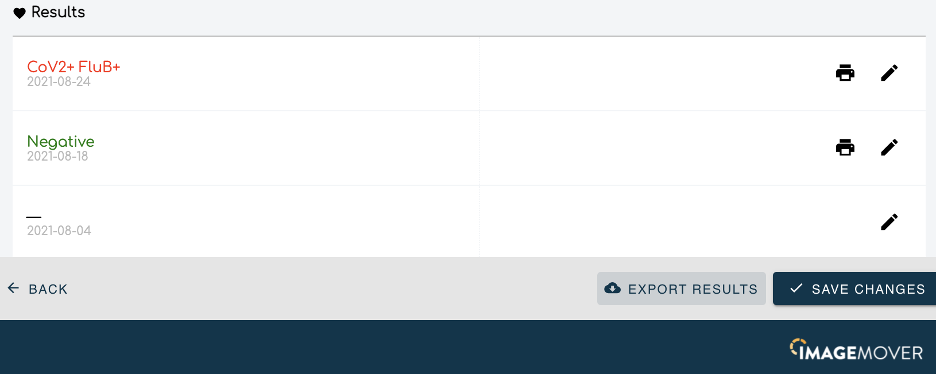
If you make any changes, be sure to press Save Changes in the bottom right corner of the screen. In addition to being able to edit Basic, Demographic, and Contact info from this screen, you can also export all of a Test Subjects results.
From the test subject details screen, you can export past results if needed. To do this, simple click on Export Results in the bottom right corner of the screen.
This will generate a CSV file of all results for the test subject.
Resending Notification Results
If you need to resend a patient their results, you can click this paper airplane icon next to the corresponding test result. The test subject needs to be opted-in for receiving test results and have a valid email or phone number saved on the test subject record.
External ID’s
You will also find a section to add, edit, and remove external ID’s that are attached to each test subject. These ID’s can be added in bulk during the test subject import process. Use the drop down to select the type of External ID, and then press “+ Add New External Identifier” to add additional ID’s on the same test subject. If you need a new type of ID added for your system, please reach out to ImageMover Support.
Removing a Test Subject
If you need to remove a test subject from your system, you can press this button. This will also remove all encounters associated with the test subject. If you need to delete test subjects in mass, please reach out to ImageMover support for assistance. This action cannot be undone.
Test Result editing
Within the edit Test Subject activity, you can see a list of their test results on the bottom portion of the screen. This high level view will show the date and the result of each test for the individual test subject.
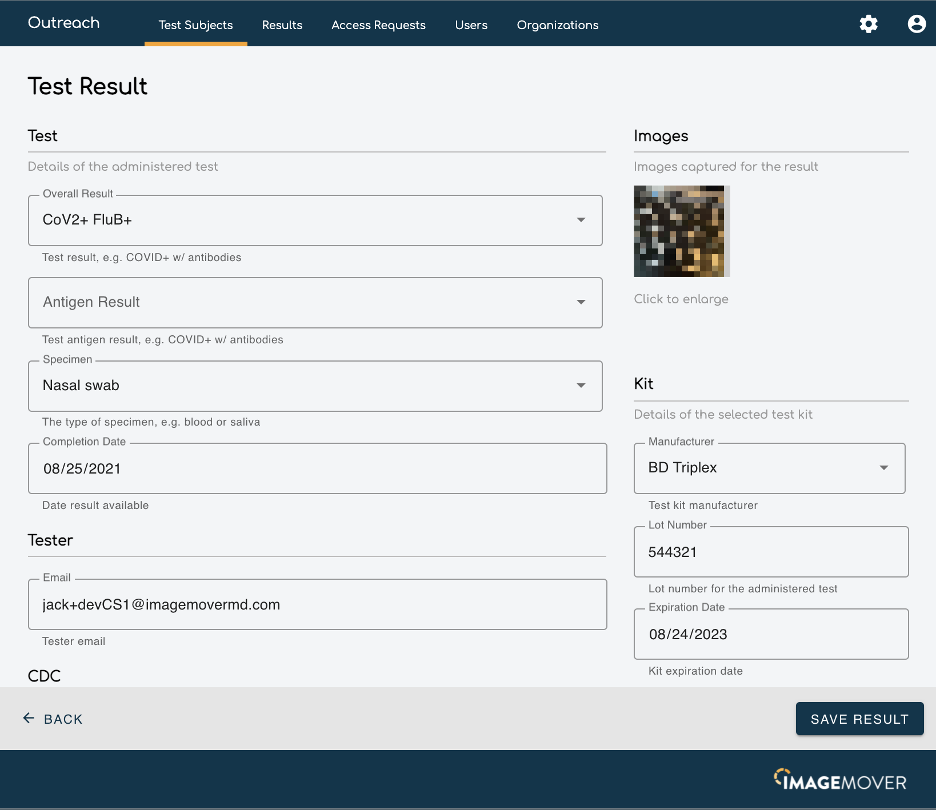
Clicking on the pencil icon for a specific test brings us to the Test Result edit activity. From here we can see all the detailed information associated with the test collection, including test kit details, recorded symptoms, attached images, locations, and performing tester. On the right hand side, you will see the photos attached to the result that you can click to expand.
If you need to edit any information regarding a Test Collection, this page allows users with the Can Manage Results right to edit these directly.
You can also expand logs at the bottom of the screen to see information about how the test result came into your system.
Test Result Deleting
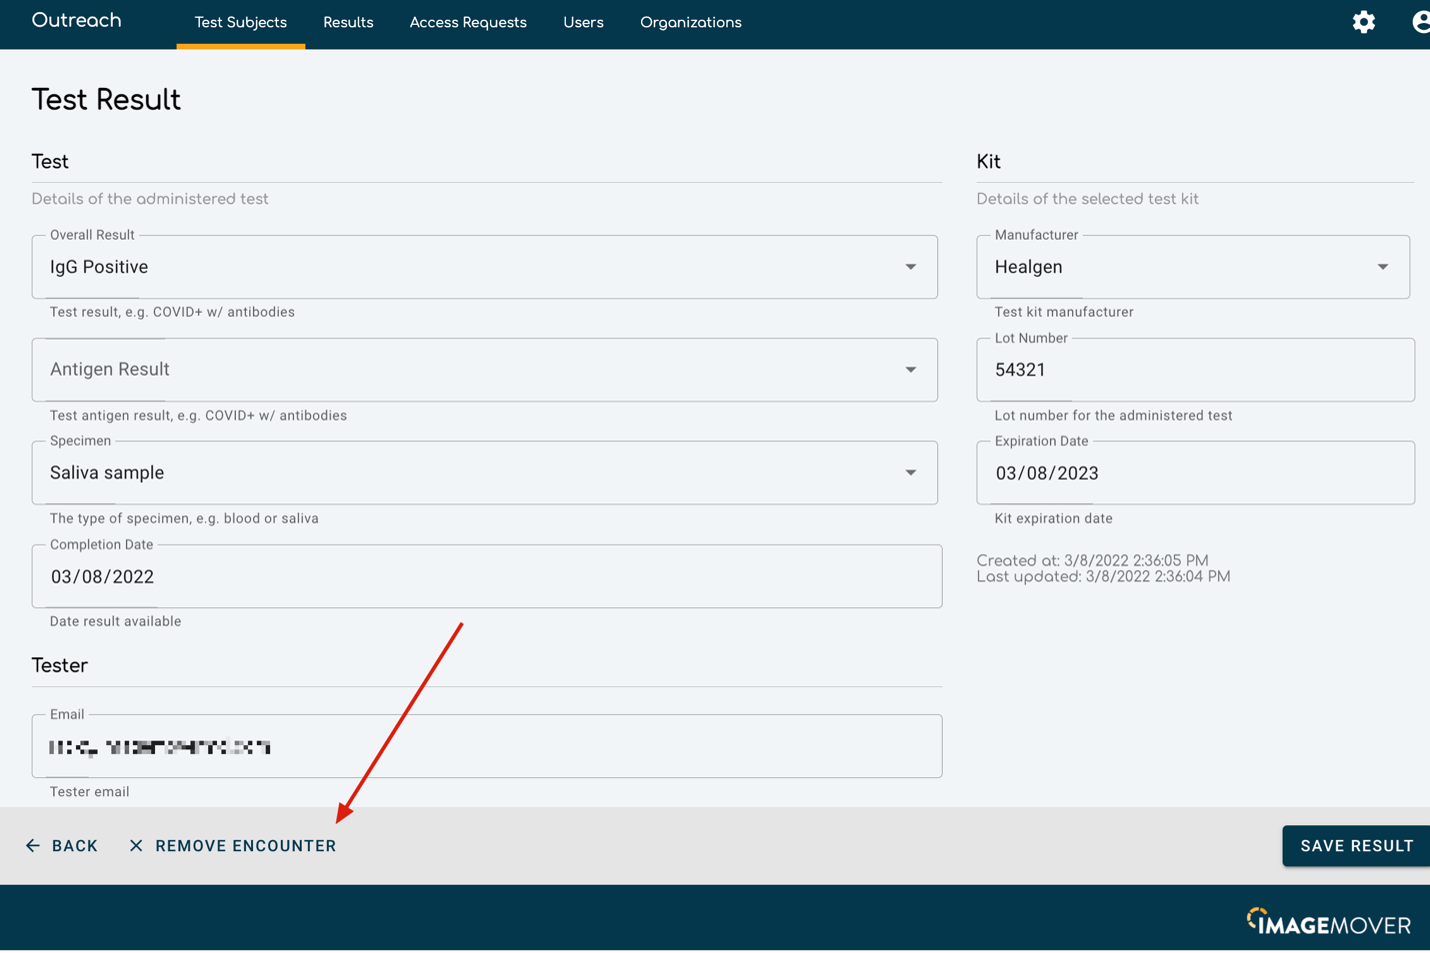
If you need to remove an entire test result, first navigate to the correct test subject via the test subject activity. Once you have clicked on the correct Test Subject, scroll down to the bottom and click on the pencil icon to edit the desired encounter. You can then find the Remove Encounter button. This action cannot be undone.
Exporting Results
Earlier you learned how to export results for one test subject. You also have the ability to export all results across a time range from your organization. Click on the “Results” tab from the top navigation bar. Note that users need the Can Export Results right to access this activity. If you have access to more than one Organization (i.e. your company has two locations with two different listings in ImageMover), you will be given the option to export data form All Organizations or just one.
After entering a date for both range fields, you are able to click on EXPORT to download a copy of your result data.
This file will be in CSV, or Comma Separated Values, format. This is easily imported into Excel, Google Sheets, or another spreadsheet editor of your choice. If you have a reporting team or data analytics expert at your organization, they can help you with any data manipulation you need to make.
If you need your organization's data to be in a different column order for reporting purposes, contact Image Mover Support and we can discuss options together.
Access Requests
Access requests are generated when a new user logs in to the app for the first time after they have created an account. Different organizations might have different default user roles when a new user creates an account and logs in for the first time. Through the web portal you can now approve or reject new user requests from the Access Requests section in the main navigation bar. They will also appear on your web portal home screen. Note that users need the Can Manage Usersright in order to approve access requests.
Note the handy REFRESH button in the top right for when you are approving the requests in real time.
Below you can see the indication from the home screen that there is a user request waiting for you.
User Editing
Finding a User
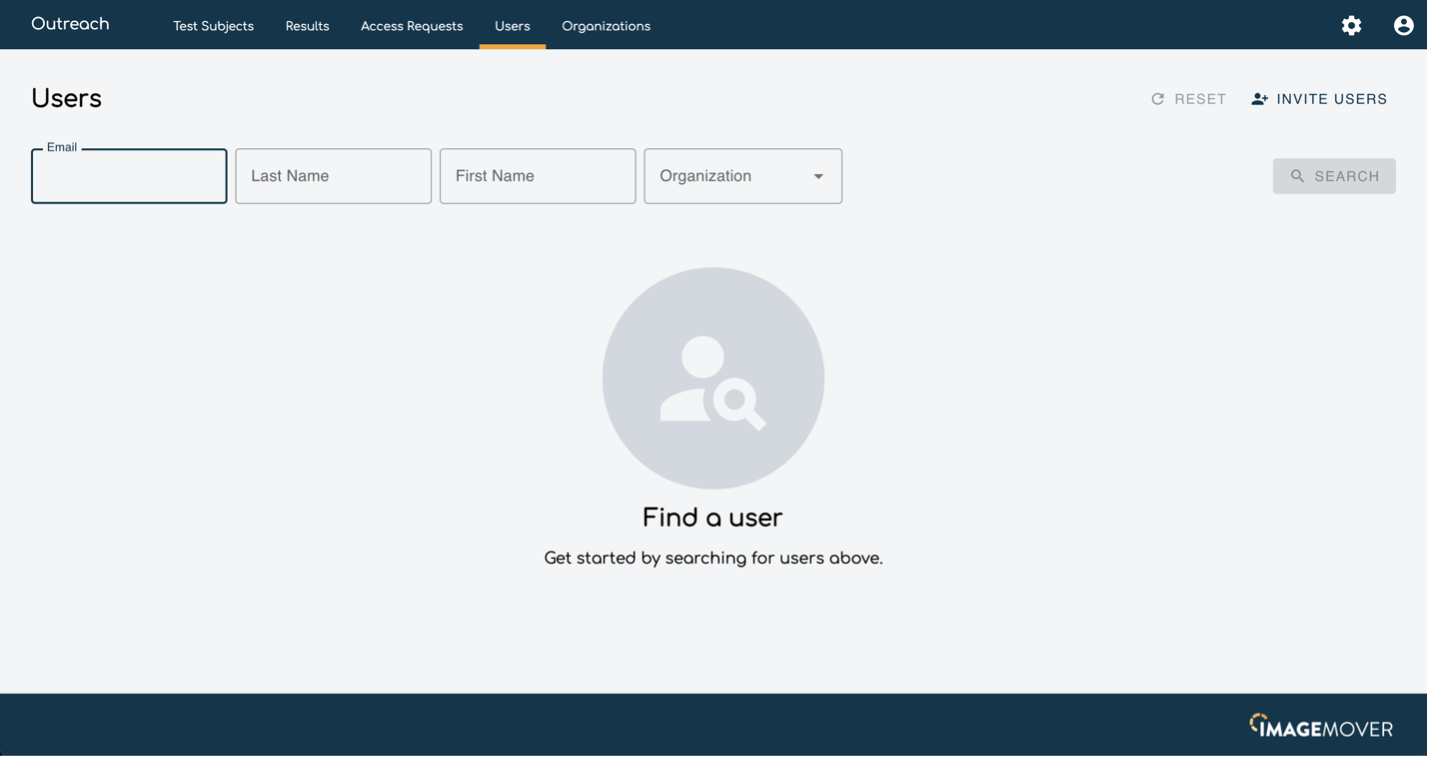
Edits to user information, their mobile application permissions, and web portal right are all accessible via the web portal. Select the Users link in the navigation bar to be brought to the user search page.
You will need to input at least one parameter to search for the user you want to edit. If you would like to see a list of users, use the Organization drop down to see different lists of users by organization. Once you have found the user to edit, you can click anywhere on the user row to enter the Edit Details page for the user.
Remember to press SAVE USER in the bottom right once you have made all the changes you need to.
Basic info
When users are created, they do not have a First Name or a Last Name - both of which are required to save other user changes. When you need to make an edit to users, you will need to fill out their First and Last name in the Basic Info section. In order to deactivate a user, deselect the “This user is enabled” box.
Mobile App Roles
If you need to change how a user interacts with the ImageMover application on their phone or tablet, you can edit their role by pressing Edit Role and changing what roles are assigned to them. The below screenshot might have additional roles depending on how your organization is configured.
rights
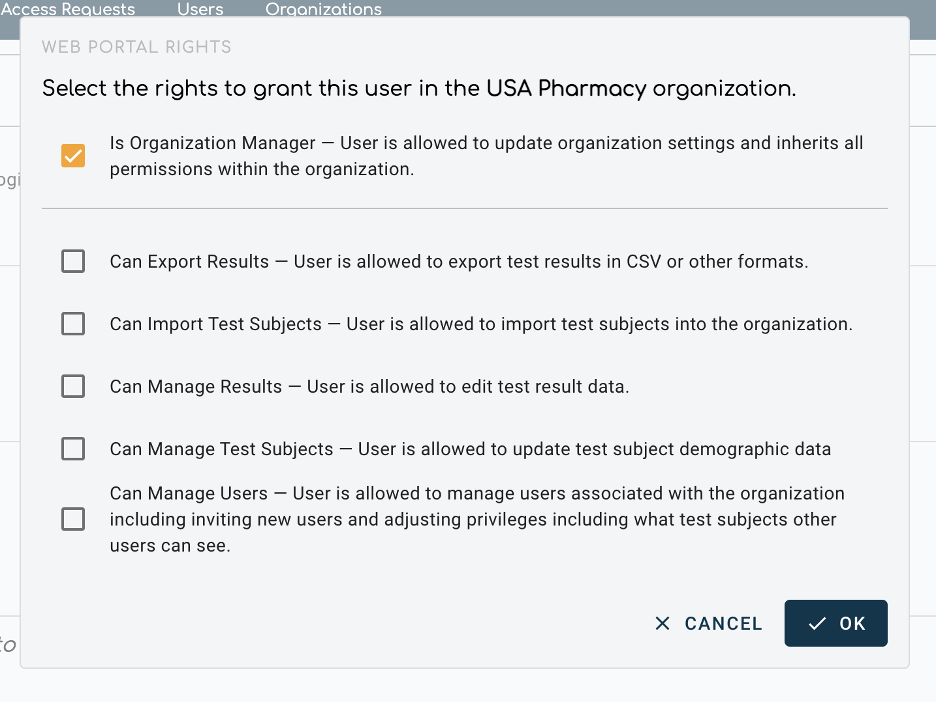
If you need to change how a user interacts with the Web Portal, you can edit their Web Portal rights by pressing Edit Rights. Selecting Is Organization Manager grants all other rights to the user. You can also be more granular in your rights selection.
Tags
If you have tags configured at your organization, you can add additional restrictions about which test subjects a user can access by pressing Edit Tags. If none are selected, then the user has access to all test subjects in the organization.
User activity report
Users tab. In the upper right hand corner, click the Activity button. This will download a CSV file that includes the following:
· ID of the Organization the user belongs to
· Organization that the user belongs to
· User’s Email
· If the user’s password is expired
· User’s Last Name (if added)
· User’s First Name (if added)
· Web Portal Rights
· Mobile App Roles
· Created Date/Time
· Last Login Date/Time
Organization management
To review options for configuring your organization, please see this document: Organization Management: Workflow Configuration Options.
Conclusion
The Web Portal is a rapidly changing piece of development at ImageMover. If you have ideas on what you would like us to include in the future, let us know!


